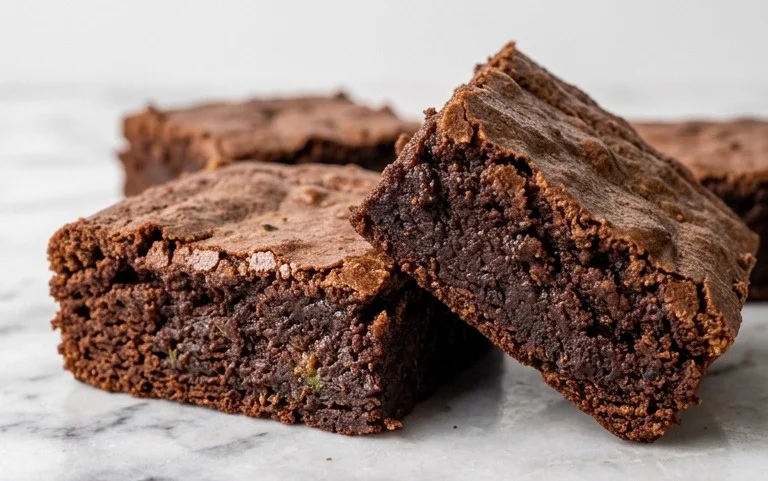
Rich Pumpkin Brownies – Decadent Fall Treat
Pumpkin brownies are more than just a dessert; they’re a comforting hug in edible form. As the autumn air grows crisp and the leaves begin their vibrant dance, there’s a primal urge to bake something that captures the season’s essence. And what better way to do that than with a batch of these unbelievably fudgy, intensely flavorful pumpkin brownies? Forget your basic chocolate squares; these little marvels blend the rich, decadent heart of a brownie with the warm, spiced embrace of pumpkin puree. The result is a texture that’s both dense and airy, a taste that’s simultaneously sweet and earthy, and an aroma that will fill your kitchen with pure autumnal bliss. They’re the perfect treat for a cozy afternoon, a festive gathering, or simply when you need a little extra sweetness in your life.
Why You’ll Love These Pumpkin Brownies
Get ready to fall in love with this delightful twist on a classic!

Pumpkin Brownies
Get ready to fall in love with these incredibly rich and decadent Pumpkin Brownies. They’re the perfect treat for any autumn gathering, holiday celebration, or simply when you’re craving something sweet and spiced. The combination of fudgy brownie goodness with the subtle, warm notes of pumpkin and spice is truly magical. Plus, they are surprisingly easy to make, especially if you start with a good quality brownie mix. This recipe is designed to deliver a moist, chewy brownie with a delightful swirl of pumpkin cream cheese that elevates it to a whole new level of deliciousness.
Ingredients:
- 1 brownie box mix (or make your own)
- 1 cup semi sweet chocolate chips
- 8 oz cream cheese softened
- 1/2 cup granulated sugar
- 1 egg (room temperature)
- 1/2 tsp vanilla extract
- 2/3 cup pumpkin (pure canned pumpkin, not pumpkin pie filling)
- 2 teaspoons pumpkin pie spice
Cooking Instructions
Preparing the Brownie Base
The foundation of our delicious pumpkin brownies starts with a fantastic brownie base. You have the option to use your favorite store-bought brownie mix for ultimate convenience, or if you’re feeling ambitious, you can whip up your own from scratch. Whichever you choose, follow the package instructions or your recipe for preparing the brownie batter. Typically, this involves combining the mix with eggs, oil, and water. For this recipe, I highly recommend using a good quality, fudgy brownie mix. The richer the brownie, the better it will complement the pumpkin swirl. Once your brownie batter is mixed, it’s time to get it into the baking pan. I like to use an 8×8 inch baking pan for a nice thick brownie. Line your pan with parchment paper, leaving some overhang on the sides. This makes lifting the brownies out of the pan so much easier for cutting, and also helps with cleanup. Spoon about two-thirds of your prepared brownie batter into the bottom of the pan and spread it evenly. Don’t worry if it’s not perfectly smooth; the pumpkin swirl will add beautiful texture.
Creating the Pumpkin Cream Cheese Swirl
Now for the star of the show: the pumpkin cream cheese swirl! This is what gives our brownies that signature fall flavor and a wonderfully creamy texture. In a medium bowl, combine the softened cream cheese and granulated sugar. Using an electric mixer, beat these together until the mixture is light and fluffy, with no lumps of cream cheese remaining. This is crucial for a smooth swirl. Next, add the egg and vanilla extract to the cream cheese mixture. Beat again until everything is well combined and smooth. Now, gently fold in the pure canned pumpkin and the pumpkin pie spice. Be sure to use pure pumpkin puree and NOT pumpkin pie filling, as the latter contains added sweeteners and spices that will throw off the flavor balance of your brownies. Mix until the pumpkin is just incorporated and you have a beautiful, creamy orange mixture. This mixture should be thick but still pourable.
Assembling and Swirling
With your brownie base prepped in the pan and your pumpkin cream cheese mixture ready to go, it’s time for the fun part: assembling these delicious layers. Dollop spoonfuls of the pumpkin cream cheese mixture over the surface of the brownie batter in the pan. Don’t be shy; you want plenty of that gorgeous pumpkin goodness. Once all the pumpkin mixture is added, take a knife or a skewer and gently swirl the pumpkin mixture into the brownie batter. You can create swirls, marbling patterns, or even just a few simple streaks. The key here is to be gentle and not overmix. You want distinct pockets of brownie and swirls of pumpkin, not a uniform color. Some of the brownie batter will peek through, and that’s perfectly fine; it creates a beautiful visual effect once baked. Try not to swirl all the way to the edges of the pan, as this can sometimes lead to the edges over-baking.
Baking and Cooling
Preheat your oven to the temperature recommended on your brownie box mix, or to 350°F (175°C) if you’re using your own recipe. Carefully place the prepared pan into the preheated oven. Bake for the time indicated on the brownie mix, or until a toothpick inserted into the center of the brownies comes out with moist crumbs attached, but not wet batter. For pumpkin brownies, it’s usually best to err on the side of slightly under-baked to ensure a fudgy center. This usually takes about 25-35 minutes. Keep an eye on them, as ovens can vary. Once baked, remove the pan from the oven and let the brownies cool completely in the pan on a wire rack. This is a crucial step! Resist the temptation to cut them while they are hot. Cooling allows the brownies to set properly, making them easier to slice and ensuring the perfect chewy texture. Once fully cooled, you can lift them out of the pan using the parchment paper overhang.
Finishing Touches and Serving
After your pumpkin brownies have cooled completely, it’s time for the best part: cutting and enjoying! Use a sharp knife to cut them into your desired square or rectangular pieces. If you’re feeling extra festive, you can sprinkle the tops with a few extra semi-sweet chocolate chips before baking, or dust them with a little extra pumpkin pie spice once cooled. These brownies are incredibly delicious on their own, but they are also amazing served with a scoop of vanilla ice cream or a dollop of whipped cream. The richness of the brownie, the creamy pumpkin swirl, and the warm spices make these a truly unforgettable treat. They store well in an airtight container at room temperature for a few days, or you can refrigerate them for longer storage. Enjoy every single bite of these delightful autumn-inspired brownies!

Conclusion:
I hope you’re as excited as I am to try these incredible Pumpkin Brownies! This recipe truly is a winner because it perfectly balances the rich, fudgy goodness of a classic brownie with the warm, comforting spices of autumn. The addition of pumpkin puree not only adds a delightful moistness but also a beautiful, earthy flavor that pairs wonderfully with the chocolate. They’re surprisingly easy to make, making them the perfect treat for a cozy afternoon or a crowd-pleasing dessert at any gathering. Don’t be afraid to get your hands a little messy – the results are absolutely worth it!
For serving, I love these pumpkin brownies warm, perhaps with a scoop of vanilla bean ice cream or a dollop of whipped cream. They also hold up beautifully at room temperature, making them ideal for bake sales or potlucks. If you’re feeling adventurous, consider adding a sprinkle of sea salt on top before baking for a delightful sweet and salty contrast, or even some chopped pecans or walnuts for an extra textural element. Seriously, give these a try – I promise you won’t be disappointed!
Frequently Asked Questions:
Can I use fresh pumpkin puree instead of canned?
Absolutely! If you’re using fresh pumpkin, make sure to roast it until tender and then puree it until very smooth. You’ll want to ensure it has a similar consistency to canned pumpkin puree, and be mindful that fresh pumpkin can sometimes contain more moisture, so you might need to drain it slightly before adding it to the batter to avoid overly wet brownies.
What’s the best way to store these pumpkin brownies?
These pumpkin brownies store wonderfully. Once completely cooled, you can keep them in an airtight container at room temperature for up to 3 days. For longer storage, they can be wrapped tightly and kept in the refrigerator for up to a week, or even frozen for up to 2 months. They thaw beautifully!
Can I make these vegan?
Yes, you can easily adapt this recipe to be vegan! You can substitute the eggs with flax eggs (1 tablespoon flaxseed meal mixed with 3 tablespoons water, let sit for 5 minutes) or a commercial egg replacer. For the butter, a good quality vegan butter alternative will work perfectly. Ensure your chocolate chips are also dairy-free.
Pumpkin Brownies
Fudgy brownies swirled with a rich and creamy pumpkin cheesecake layer, perfect for fall.
Ingredients
-
1 brownie box mix (or make your own)
-
1 cup semi sweet chocolate chips
-
8 oz cream cheese softened
-
1/2 cup granulated sugar
-
1 egg (room temperature)
-
1/2 tsp vanilla extract
-
2/3 cup pumpkin (pure canned pumpkin, not pumpkin pie filling)
-
2 teaspoons pumpkin pie spice
Instructions
-
Step 1
Preheat your oven to 350°F (175°C). Grease and flour a 9×13 inch baking pan. -
Step 2
Prepare the brownie batter according to the box mix instructions or your homemade recipe. Stir in 1/2 cup of the semi-sweet chocolate chips. -
Step 3
In a medium bowl, beat together the softened cream cheese, granulated sugar, room temperature egg, and vanilla extract until smooth. Stir in the pumpkin puree and pumpkin pie spice until well combined. -
Step 4
Spread half of the brownie batter evenly into the prepared baking pan. Dollop spoonfuls of the pumpkin cream cheese mixture over the brownie batter. Sprinkle the remaining 1/2 cup of semi-sweet chocolate chips over the pumpkin layer. Top with the remaining brownie batter, spreading it as evenly as possible. -
Step 5
Using a knife or skewer, swirl the pumpkin mixture into the brownie batter to create a marbled effect. Do not overmix. -
Step 6
Bake for 30-35 minutes, or until a toothpick inserted into the center comes out with moist crumbs (not wet batter). -
Step 7
Let the brownies cool completely in the pan before cutting into squares.
Important Information
Nutrition Facts (Per Serving)
It is important to consider this information as approximate and not to use it as definitive health advice.
Allergy Information
Please check ingredients for potential allergens and consult a health professional if in doubt.