Soft Garlic Bread Rolls- Pillowy Herb Infused Delights
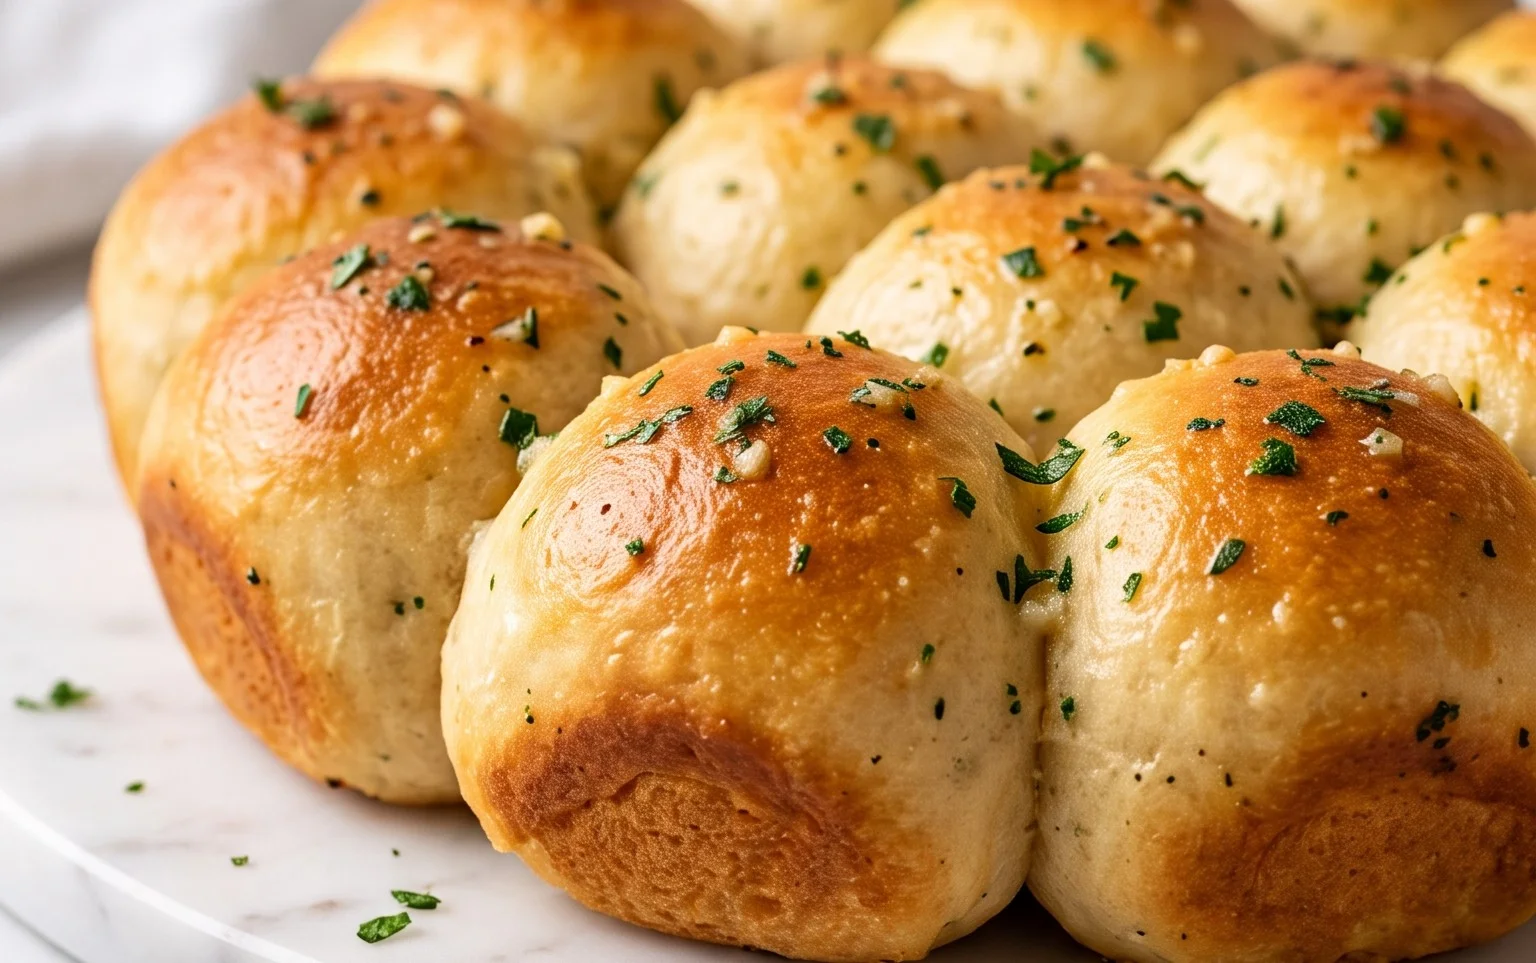
Garlic Bread Rolls are more than just a side dish; they’re a declaration of comfort and pure, unadulterated deliciousness. Imagine them, golden brown and pillowy soft, emerging from the oven, their aroma filling your kitchen with the irresistible promise of garlicky goodness. Who can resist the allure of these delightful morsels? They’re the universal crowd-pleaser, the perfect companion to pasta, soups, stews, or even just enjoyed on their own as a savory snack. What truly sets our Garlic Bread Rolls apart is the perfect balance we strike between a tender, slightly chewy interior and a beautifully crisp, buttery crust. We’re not just talking about a hint of garlic; we’re talking about a symphony of flavor that will have everyone reaching for seconds, and maybe even thirds. Get ready to elevate your dining experience with this foolproof recipe.
Garlic Bread Rolls
There are few things as comforting and universally loved as warm, buttery garlic bread. But why settle for sliced bread when you can elevate your experience with homemade garlic bread rolls? These aren’t just any rolls; they’re soft, pillowy clouds of dough infused with fragrant garlic and fresh herbs, baked to golden perfection. They’re perfect as a side dish to your favorite pasta or soup, or even as a delightful appetizer all on their own. The aroma that fills your kitchen as these bake is simply non-intoxicating. Making them from scratch might seem daunting, but I promise you, with these clear instructions, you’ll be whipping up a batch of these incredible rolls in no time. Let’s get started!
Ingredients:
- 4 1/2 tablespoons unsalted butter
- 2 tablespoons minced garlic
- 3 1/2 cups + 1 tablespoon all-purpose flour (*See notes below for measuring*)
- 3 tablespoons chopped fresh parsley
- 1 tablespoon granulated sugar
- 2 1/4 teaspoons instant yeast
- 1 teaspoon fine sea salt
- 1 cup whole or 2% milk (warmed to 110°F)
- 1 large egg (room temperature)
- 1 beaten egg, for brushing the tops
- 2 tablespoons unsalted butter
- 1 tablespoon minced garlic
- 1 tablespoon chopped fresh parsley
- flaky sea salt (for finishing)
Making the Dough
The foundation of any great bread is a well-made dough. We’ll start by activating our yeast and then combining all the dry and wet ingredients. The key here is patience; allowing the dough to develop properly will result in those wonderfully soft rolls.
1. In a small bowl, combine the 1 cup of warmed milk with the 1 tablespoon of granulated sugar. Sprinkle the 2 1/4 teaspoons of instant yeast over the top. Give it a gentle stir and let it sit for about 5-10 minutes. You should see the mixture become foamy and bubbly, indicating that your yeast is alive and ready to work its magic. If it doesn’t foam, your yeast might be old, and it’s best to start again with fresh yeast.
2. In a large mixing bowl (or the bowl of your stand mixer fitted with the dough hook), whisk together the 3 1/2 cups + 1 tablespoon of all-purpose flour and the 1 teaspoon of fine sea salt. Make a well in the center. Add the 1 large egg and the foamy yeast mixture to the well.
3. Begin mixing the ingredients. If using a stand mixer, start on low speed until a shaggy dough forms. If mixing by hand, use a wooden spoon or your hands to bring everything together. Once the ingredients are mostly combined, increase the mixer speed to medium-low (or turn out the dough onto a lightly floured surface if mixing by hand). Knead the dough for about 8-10 minutes. The dough should become smooth, elastic, and slightly tacky. It should pull away from the sides of the bowl. If it’s too sticky, add a tablespoon of flour at a time, kneading it in until the desired consistency is reached. If it feels too dry, add a teaspoon of milk at a time.
First Rise and Shaping
After kneading, the dough needs time to rest and rise. This process develops flavor and creates that signature airy texture. Then, we’ll shape them into perfect little rolls.
4. Lightly grease a clean bowl with a little oil or cooking spray. Place the kneaded dough into the bowl, turning it to coat all sides. Cover the bowl tightly with plastic wrap or a clean kitchen towel. Let the dough rise in a warm place for 1 to 1.5 hours, or until it has doubled in size. This is often referred to as the “first rise” or “bulk fermentation.” A good trick for a warm place is to turn your oven on to its lowest setting for a minute, then turn it off and place the covered bowl inside.
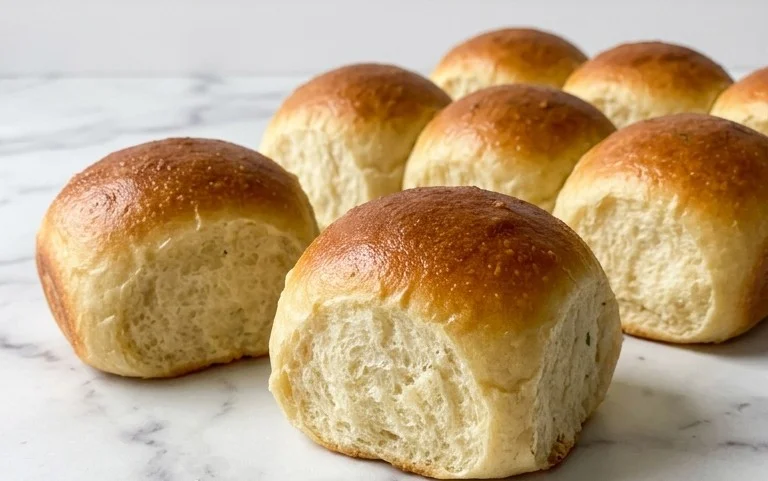
5. Once the dough has doubled, gently punch it down to release the air. Turn the dough out onto a lightly floured surface. Now comes the fun part: shaping! For these rolls, we’ll create a simple yet elegant shape. Divide the dough into 12 equal portions. You can do this by eye, or for precision, you can weigh each portion. Roll each portion into a smooth ball. Place the dough balls into a greased 9×13 inch baking pan, leaving a little space between them to allow for their second rise. You can arrange them in neat rows.
Infusing the Garlic Flavor and Second Rise
This is where the magic of garlic and butter comes in. We’ll create a delicious garlic butter mixture to brush over the rolls, enhancing their flavor and giving them a beautiful golden sheen.
6. While the rolls are getting ready for their second rise, prepare the garlic butter topping. In a small saucepan over low heat, melt the 4 1/2 tablespoons of unsalted butter. Once melted, stir in the 2 tablespoons of minced garlic and the 3 tablespoons of chopped fresh parsley. Let this mixture infuse for about 5 minutes, allowing the garlic flavor to bloom in the butter. Be careful not to burn the garlic. Remove from heat and set aside.
7. Once the shaped rolls have had a chance to rise for about 30-45 minutes (they should look puffy and nearly touching each other), it’s time to prepare them for baking. Preheat your oven to 375°F (190°C). Brush the tops of the risen rolls generously with the beaten egg. This egg wash will give them a beautiful, glossy, golden-brown finish.
Baking to Perfection
The final stage is baking, where the dough transforms into fragrant, golden rolls. The smell alone will have your mouth watering!
8. Now, generously drizzle or brush the infused garlic butter mixture over the tops of each roll. Make sure to get some of that delicious garlic and parsley goodness on every single one. Finally, sprinkle a pinch of flaky sea salt over the top of each roll for a delightful little crunch and burst of flavor.
9. Bake the garlic bread rolls in the preheated oven for 15-20 minutes, or until they are beautifully golden brown on top and sound hollow when tapped. The exact baking time will depend on your oven, so keep a close eye on them, especially towards the end of the baking time.
10. Once baked to perfection, remove the pan from the oven. For an extra boost of garlicky goodness, you can melt the remaining 2 tablespoons of unsalted butter with the remaining 1 tablespoon of minced garlic and 1 tablespoon of chopped fresh parsley. Drizzle this warm mixture over the hot rolls immediately after they come out of the oven. Serve them warm and enjoy the incredible aroma and taste!
*Notes on Measuring Flour: To accurately measure your flour, use the “spoon and level” method. Spoon the flour into your measuring cup until it’s overflowing, then level off the excess with a straight edge, like the back of a knife. This prevents you from using too much flour, which can lead to dense rolls.*

Conclusion:
And there you have it – your guide to creating the most delectable garlic bread rolls! This recipe is truly fantastic because it delivers perfectly golden, pillowy rolls infused with the irresistible aroma and flavor of garlic butter, all without requiring a long proofing time. They are wonderfully versatile, making them the ideal accompaniment to a wide range of meals. Imagine them alongside a hearty pasta dish, a steaming bowl of soup, a grilled steak, or even as a standalone snack. The beauty of these rolls also lies in their adaptability. Feel free to experiment with adding a pinch of red pepper flakes for a touch of heat, a sprinkle of fresh herbs like parsley or chives, or even a grating of Parmesan cheese for an extra savory kick. I truly encourage you to give this garlic bread rolls recipe a try; I promise you won’t be disappointed!
Frequently Asked Questions:
Can I make these garlic bread rolls ahead of time?
Yes, you absolutely can! You can prepare the dough and let it do its first rise, then punch it down, shape it, and place it in the baking pan. Cover it tightly and refrigerate overnight. In the morning, let them sit at room temperature for about 30-60 minutes until they look puffy, then bake as directed. You can also bake them completely, let them cool, and then reheat them in a warm oven for a few minutes before serving.
My rolls didn’t rise as much as yours. What could I have done wrong?
There are a few common reasons for this. Ensure your yeast was fresh and active; you can test this by dissolving it in warm (not hot!) liquid with a pinch of sugar – it should become foamy. Also, make sure the liquid you used was at the correct temperature (lukewarm is ideal for yeast activation). Overworking the dough can also hinder rising, so be careful not to knead for too long. Finally, ambient temperature plays a role; a warm kitchen helps dough rise faster and more effectively.
Garlic Bread Rolls
Deliciously savory and easy-to-make garlic bread rolls, perfect as a side dish or snack. Soft, fluffy rolls infused with garlic and herbs, brushed with a garlic-butter mixture before baking.
Ingredients
-
4 1/2 tablespoons unsalted butter
-
2 tablespoons minced garlic
-
3 1/2 cups + 1 tablespoon all-purpose flour
-
3 tablespoons chopped fresh parsley
-
1 tablespoon granulated sugar
-
2 1/4 teaspoons instant yeast
-
1 teaspoon fine sea salt
-
1 cup whole or 2% milk (warmed to 110°F)
-
1 large egg (room temperature)
-
1 beaten egg, for brushing the tops
-
2 tablespoons unsalted butter
-
1 tablespoon minced garlic
-
1 tablespoon chopped fresh parsley
-
flaky sea salt (for finishing)
Instructions
-
Step 1
In a small bowl, melt 4 1/2 tablespoons of butter. Stir in 2 tablespoons of minced garlic and 3 tablespoons of chopped parsley. Set aside. -
Step 2
In a large bowl, whisk together the flour, sugar, yeast, and salt. Make a well in the center. -
Step 3
Pour the warmed milk and the room temperature egg into the well. Mix until a shaggy dough forms. -
Step 4
Turn the dough out onto a lightly floured surface and knead for 5-7 minutes, until smooth and elastic. Place the dough in a greased bowl, cover, and let rise in a warm place for 1 hour, or until doubled in size. -
Step 5
Punch down the dough and divide it into 12 equal pieces. Shape each piece into a small roll and place them on a baking sheet lined with parchment paper. -
Step 6
Cover the rolls loosely and let them rise for another 30 minutes. -
Step 7
Preheat oven to 375°F (190°C). -
Step 8
Brush the tops of the rolls with the beaten egg. Bake for 15-20 minutes, or until golden brown. -
Step 9
While the rolls are still warm, melt the remaining 2 tablespoons of butter. Stir in the remaining 1 tablespoon of minced garlic and 1 tablespoon of chopped parsley. Brush this mixture over the warm rolls and sprinkle with flaky sea salt.
Important Information
Nutrition Facts (Per Serving)
It is important to consider this information as approximate and not to use it as definitive health advice.
Allergy Information
Please check ingredients for potential allergens and consult a health professional if in doubt.