Peanut Butter Spider Cookies Recipe
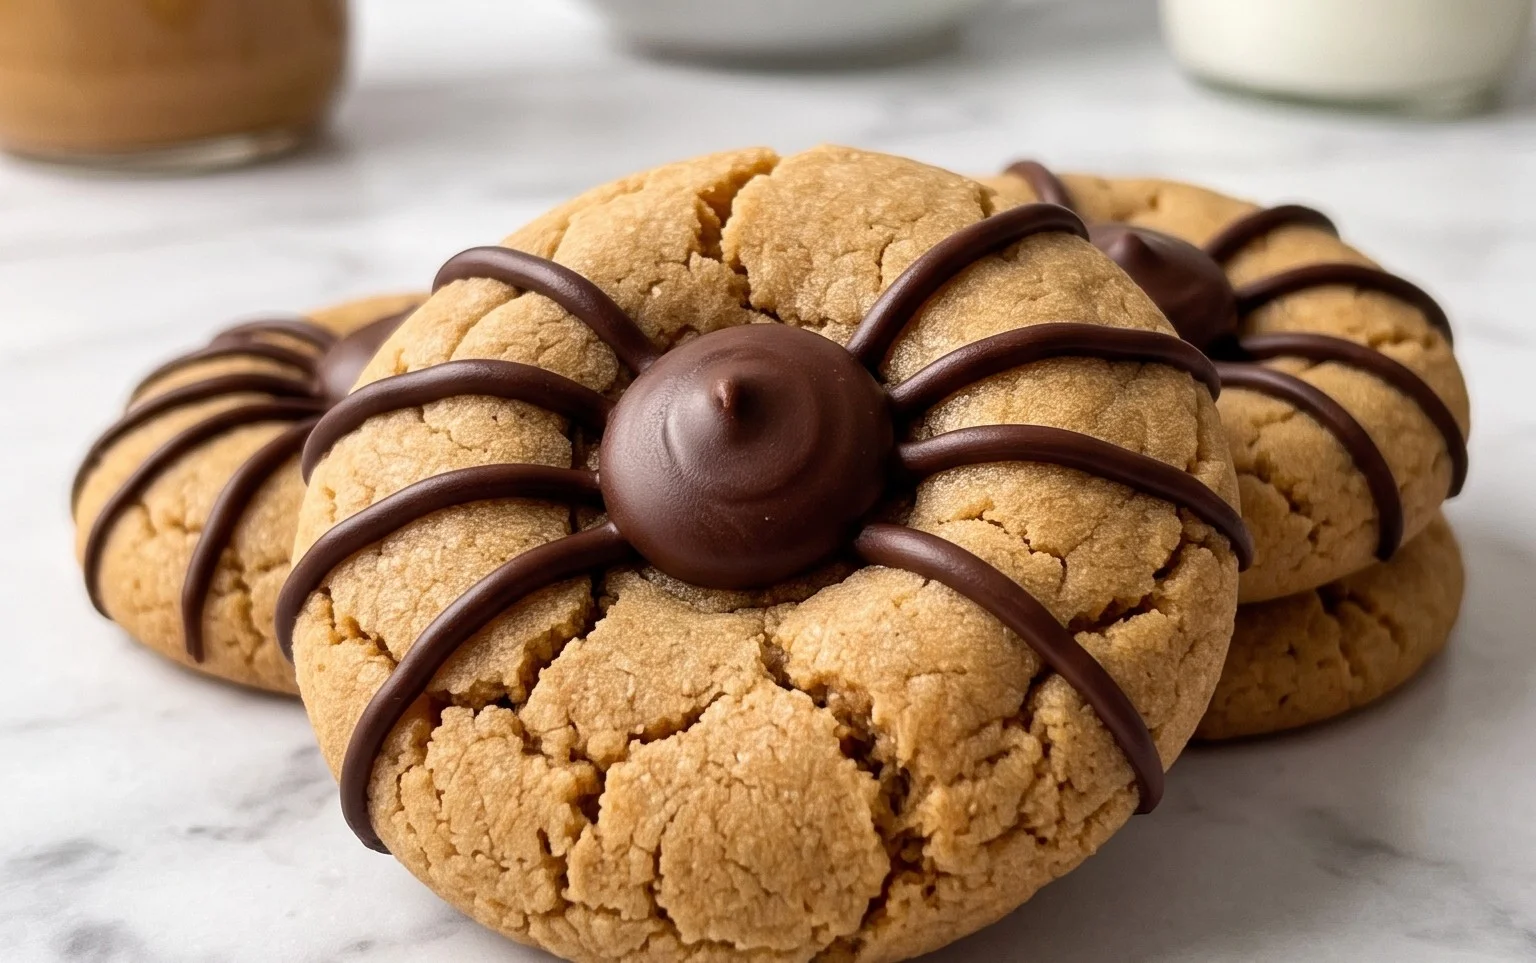
Peanut Butter Spider Cookies are a fun and festive twist on a classic treat, perfect for Halloween or any time you want a playful dessert. Imagine a chewy, soft peanut butter cookie, but then imagine it transformed into a creepy-crawly spider. That’s exactly what these cookies are! The base is a simple, reliable peanut butter cookie dough that’s easy to whip up, even with kids. What makes them truly special, besides the adorable spider theme, is the textural contrast: the soft cookie, the crunchy malted Whopper body, and the delicate chocolate chip webs. They’re not just visually appealing; they taste fantastic too. This recipe brings together familiar flavors with a touch of spooky creativity, making them a hit for bake sales and parties alike. Get ready to impress with these charming Peanut Butter Spider Cookies.
Peanut Butter Spider Cookies
These Peanut Butter Spider Cookies start with the simple joy of a classic peanut butter cookie, but with a few Halloween-themed additions that make them incredibly fun to make and to eat. We’re using Whoppers as the spider bodies, which adds a little malted crunch inside a chewy cookie. The chocolate chip webs and white gel eyes bring the whole creature to life. They’re perfect for bake sales, Halloween parties, or just a fun afternoon in the kitchen with kids.
Ingredients:
- 1 ½ cups all-purpose flour
- ½ tsp baking soda
- ½ tsp baking powder
- ½ cup salted butter (softened)
- ½ cup granulated sugar
- ½ cup brown sugar
- 1 egg
- ½ cup creamy peanut butter (not natural)
- 1 tsp vanilla
- 44 Whoppers
- 1 cup semi-sweet chocolate chips ((6 ounces))
- 1 small tube white cake decorating gel
- ¼ cup granulated sugar (for rolling)
Making the Cookie Dough
- Creaming the Butter and Sugars: In a large mixing bowl, begin by creaming together the softened salted butter, granulated sugar, and brown sugar. You want this mixture to be light and fluffy. I like to use an electric mixer for this, starting on low speed and gradually increasing it. Beat until there are no visible lumps of butter and the sugars are fully incorporated into the butter, creating a pale, airy base for our cookies. This step is important because it incorporates air into the dough, which helps the cookies spread and become tender. Scrape down the sides of the bowl a couple of times to make sure everything is evenly mixed.
- Adding Wet Ingredients and Peanut Butter: Next, add the egg and vanilla extract to the creamed butter and sugar mixture. Beat again until everything is well combined. Then, it’s time for the star of the show: the peanut butter. Make sure you’re using a creamy, commercial peanut butter like Jif or Skippy, not a natural one where the oil separates. Natural peanut butter can make the dough too oily and affect the cookie’s texture. Beat in the peanut butter until it’s thoroughly incorporated into the dough, creating a smooth, cohesive mixture. It should smell wonderfully of peanut butter already!
- Incorporating Dry Ingredients: In a separate medium bowl, whisk together the all-purpose flour, baking soda, and baking powder. This ensures that the leavening agents are evenly distributed throughout the flour, which is essential for the cookies to rise properly. Gradually add this dry mixture to the wet ingredients in the large bowl, mixing on low speed or by hand with a spatula until just combined. Be careful not to overmix the dough at this stage. Overmixing can develop the gluten in the flour too much, resulting in tough cookies. Stop mixing as soon as you no longer see streaks of flour.
Assembling the Spider Cookies
- Forming the Cookies and Adding the Spider Body: Take the cookie dough and roll it into small balls, about 1 inch in diameter. For this recipe, you’ll need about 44 balls because we’re using one Whopper per cookie. Before placing them on your baking sheet, roll each ball in the ¼ cup of granulated sugar you set aside. This sugar coating will give the cookies a slightly crisp exterior and a lovely sparkle. Arrange the sugared dough balls on baking sheets lined with parchment paper, leaving about 2 inches between them, as they will spread as they bake. Now, gently press one Whopper into the center of each cookie dough ball. The Whopper will become the body of our spider.
- Baking and Decorating: Bake the cookies in a preheated oven at 375°F (190°C) for 9 to 12 minutes, or until the edges are lightly golden and the centers are still slightly soft. They will continue to bake a bit on the hot baking sheet after you remove them from the oven. Let them cool on the baking sheets for a few minutes before transferring them to a wire rack to cool completely. Once the cookies are entirely cool, it’s time to create the webs and eyes. Melt the semi-sweet chocolate chips in a microwave-safe bowl, stirring every 30 seconds, or use a double boiler until smooth. Transfer the melted chocolate to a small piping bag or a Ziploc bag with a corner snipped off. Carefully pipe concentric circles of melted chocolate onto the top of each cookie, starting from the center and working your way out. Then, drag a toothpick from the center outwards to create a spiderweb effect. Finally, use the white cake decorating gel to add two small dots for eyes above the web. These cookies are best stored in an airtight container at room temperature for up to 3 days.
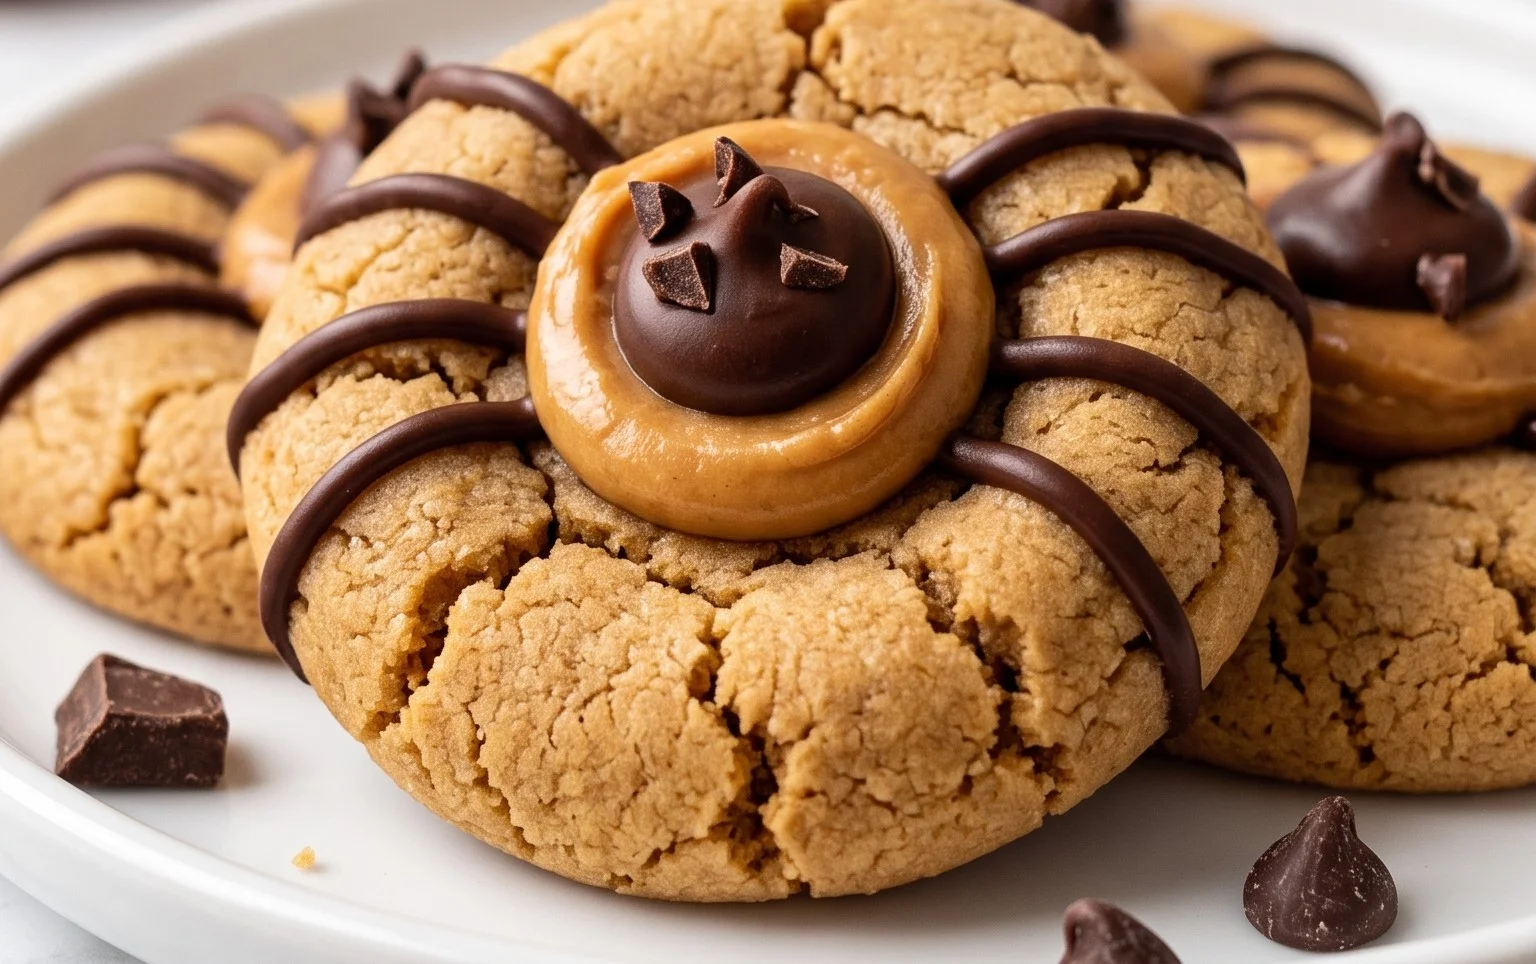
Conclusion:
These Peanut Butter Spider Cookies are a fantastic way to make classic peanut butter cookies extra special, especially around Halloween. They’re simple enough for a weeknight bake but impressive enough for any party. The combination of the chewy cookie, the crunchy Whopper spider body, and the delicate chocolate webs creates a delightful treat that kids and adults will love. Remember, the key to perfect cookies is not overmixing the dough once the flour is added, and baking them until the edges are just golden. They store well, making them great for making ahead.
Can I make these cookies ahead of time?
Yes, you can definitely make these cookies ahead. The baked cookies will stay fresh in an airtight container at room temperature for up to 3-4 days. You can also freeze the unbaked cookie dough balls for up to 3 months; just bake them directly from frozen, adding a few extra minutes to the baking time.
What if I don’t have Whoppers?
If you can’t find Whoppers, you can substitute them with other malted milk balls or even chocolate-covered raisins for a different flavor and texture. For a simpler spider body, you could also use a round chocolate candy like a Junior Mint or a chocolate kiss, though the texture will be different.
How do I make the chocolate webs cleaner?
For cleaner webs, ensure your chocolate chips are fully melted and smooth. Use a piping bag with a very fine tip or a small ziplock bag with the corner snipped off. Practice on a piece of parchment paper first to get a feel for the flow. Don’t worry if they aren’t perfect; the ‘spider’ look is part of the charm!
Peanut Butter Spider Cookies
Spooky and delicious peanut butter cookies topped with chocolate spiders for a festive treat.
Ingredients
-
1 ½ cups all-purpose flour
-
½ tsp baking soda
-
½ tsp baking powder
-
½ cup salted butter (softened)
-
½ cup granulated sugar
-
½ cup brown sugar
-
1 egg
-
½ cup creamy peanut butter (not natural)
-
1 tsp vanilla
-
44 whoppers
-
1 cup semi-sweet chocolate chips
-
1 small tube white cake decorating gel
-
¼ cup granulated sugar (for rolling)
Instructions
-
Step 1
Preheat oven to 350°F (175°C). Line baking sheets with parchment paper. -
Step 2
In a medium bowl, whisk together flour, baking soda, and baking powder. -
Step 3
In a large bowl, cream together softened butter, granulated sugar, and brown sugar until light and fluffy. Beat in the egg and vanilla. -
Step 4
Stir in the peanut butter until well combined. Gradually add the dry ingredients to the wet ingredients, mixing until just combined. The dough will be stiff. -
Step 5
Roll dough into 1-inch balls and then roll each ball in the ¼ cup granulated sugar set aside for rolling. Place balls on prepared baking sheets. -
Step 6
Bake for 9-11 minutes, or until edges are lightly golden. Let cookies cool on the baking sheets for a few minutes before transferring to wire racks to cool completely. -
Step 7
Melt chocolate chips in a microwave-safe bowl in 30-second intervals, stirring between each, until smooth. -
Step 8
To create the spiders: dip a Whopper into melted chocolate and place it in the center of a cooled cookie. Use the melted chocolate to “glue” 8 small chocolate chip legs and two white gel eyes onto the Whopper to resemble a spider. Let the chocolate set completely.
Important Information
Nutrition Facts (Per Serving)
It is important to consider this information as approximate and not to use it as definitive health advice.
Allergy Information
Please check ingredients for potential allergens and consult a health professional if in doubt.